
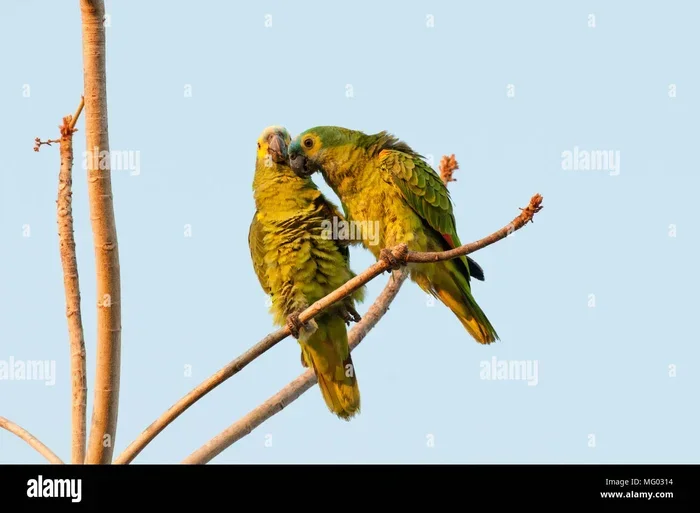
Featured image for Amazon parrots breeding pair
Image source: c8.alamy.com
Breeding Amazon parrots requires careful pair selection, proper nesting setup, and specialized nutrition. This comprehensive guide covers everything from choosing compatible mates and creating the ideal breeding environment to hand-feeding chicks and preventing common health issues. Follow these expert steps to raise healthy, well-socialized Amazon parrot babies.
Breeding Amazon parrots feels a bit like directing a very particular play. The actors have minds of their own, the script changes daily, and the audience (future bird owners) expects perfection. But when it works? There is nothing quite like watching a tiny, pink hatchling grow into a brilliant green companion with a vocabulary that would make a sailor blush.
I have spent years working with aviculturists, veterinarians, and dedicated hobbyists who breed Amazons. The consensus is always the same: success lives in the details. Skip one step, rush one timeline, and the whole production can fall apart. This guide walks you through every act, from the first introduction to the day your babies leave for their forever homes.
Key Takeaways
- Pair compatibility is everything: Amazon parrots must bond naturally; forced pairs rarely breed successfully and may become aggressive.
- Seasonal triggers matter: Most species breed in spring; manipulate light cycles and temperature to mimic natural conditions.
- Nest box design affects success: Deep, vertical boxes with proper substrate prevent egg breakage and chick splay leg.
- Nutrition doubles during breeding: Parents need high-calcium, high-protein diets weeks before laying through weaning.
- Incubation lasts 24-28 days: Both parents share duties; candling at day 7-10 confirms fertility without disturbing the pair.
- Hand-feeding requires precision: Formula temperature, consistency, and feeding schedule must be exact to prevent aspiration or crop stasis.
- Socialization starts early: Daily handling from 2-3 weeks produces confident, pet-quality birds; neglect creates fearful adults.
📑 Table of Contents
- Understanding Amazon Parrot Breeding Basics
- Selecting and Preparing Your Breeding Pair
- Creating the Perfect Breeding Environment
- From Egg to Hatch: The Incubation Period
- Raising Chicks: Parent-Raised vs. Hand-Fed
- Health Management and Troubleshooting
- Socialization, Placement, and Legal Responsibilities
- Advanced Tips from Seasoned Breeders
- Conclusion
Understanding Amazon Parrot Breeding Basics
Before you buy a nest box or calculate formula temperatures, you need to understand who these birds are. Amazon parrots belong to the genus Amazona, comprising roughly 30 species native to the Americas, from Mexico through South America and the Caribbean. Popular breeding species include the Yellow-naped, Double Yellow-headed, Blue-fronted, Orange-winged, and Lilac-crowned Amazons.
Who Should Breed Amazon Parrots
Breeding Amazons is not a casual hobby. It demands time, money, veterinary access, and emotional resilience. You are the right candidate if you already keep parrots successfully, understand their body language, have an avian veterinarian on speed dial, and can afford unexpected medical bills. You also need space. A breeding pair needs a flight cage or aviary at least 6 feet long, 3 feet wide, and 4 feet tall. Larger is better.
Did you know? According to the Association of Avian Veterinarians, over 60% of first-time breeding attempts fail due to nutritional deficiencies or environmental stress, not infertility.
What Makes Amazon Breeding Unique
Amazons are monogamous, long-lived, and intensely territorial during breeding season. Unlike budgies or cockatiels, they do not tolerate colony breeding. One pair per enclosure. Period. They also have a distinct breeding season triggered by photoperiod (day length) and rainfall patterns in the wild. In captivity, we replicate this with lighting and humidity controls.
Where Breeding Happens Best
Indoor aviaries with full-spectrum lighting offer the most control. Outdoor flights work in temperate climates but expose birds to predators, parasites, and weather extremes. If you breed indoors, you need ventilation, humidity control (50-60%), and the ability to simulate dawn and dusk. A dedicated bird room is ideal. Spare bedrooms work if you can handle the dust, noise, and occasional escaped feather.
When the Breeding Season Starts
Most North American Amazons begin showing breeding behavior in late winter (January-February) as days lengthen. Egg-laying typically starts March through May. Chicks hatch April through June. Weaning finishes by September or October. This timeline shifts based on species, latitude, and your lighting program. Equatorial species like the Orange-winged Amazon may breed year-round if conditions allow.
Why Breed At All
Conservation, companionship, and preservation of bloodlines drive most breeders. Many Amazon species face habitat loss and trapping pressure in the wild. Captive breeding reduces demand for wild-caught birds. Well-socialized, hand-raised Amazons make extraordinary companions for the right homes. They can live 50-70 years. Breeding them responsibly means planning for their entire lifespan.
Selecting and Preparing Your Breeding Pair
The pair is your foundation. Get this wrong, and nothing else matters. Amazons choose their mates. You cannot simply put a male and female together and expect romance.
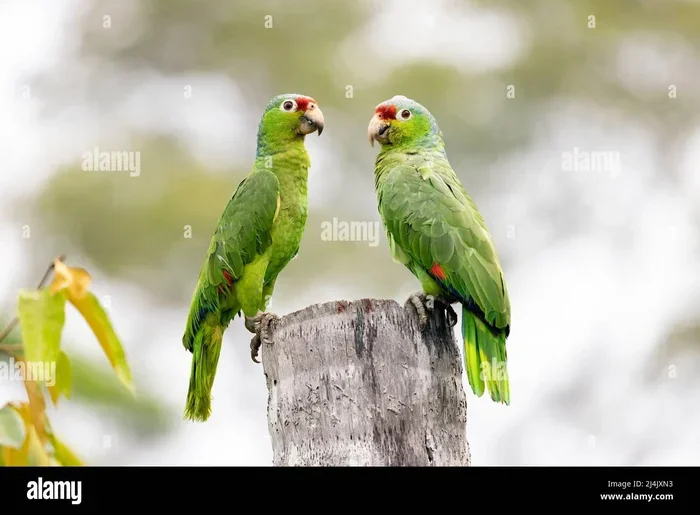
Visual guide about Amazon parrots breeding pair
Image source: c8.alamy.com
Age and Maturity Requirements
Amazons reach sexual maturity between 3 and 6 years depending on species. Smaller species like the White-fronted Amazon mature around 3 years. Larger species like the Double Yellow-headed need 5-6 years. Breeding too early produces weak eggs, poor parenting, and health complications for the hen. Wait until both birds show full adult plumage and behavioral maturity.
Sexing Your Birds
Most Amazon species are not sexually dimorphic. You cannot tell male from female by looks alone. DNA sexing (blood feather or eggshell membrane) or surgical sexing by an avian veterinarian is mandatory. Guessing leads to same-sex pairs that bond but never produce. I have seen “pairs” live together for years before the owner discovered both were hens.
Health Screening Before Introduction
Both birds need a complete avian veterinary workup before meeting. Test for Psittacine Beak and Feather Disease (PBFD), Polyomavirus, Chlamydia (psittacosis), and Pacheco’s disease. Run a complete blood count and chemistry panel. Check for heavy metal toxicity. Deworm if needed. Quarantine new birds 45-60 days minimum. This feels excessive until you lose a pair to a preventable disease.
The Introduction Process
Think of this as arranged dating with supervision. Place cages side by side, 2 feet apart, for 2-4 weeks. Watch for mutual preening through bars, food sharing, and synchronous behavior (eating, sleeping, playing at the same time). Aggression (lunging, screaming, feather picking) means stop. Try a different partner.
Once they show clear affinity, introduce them in a neutral space (a play gym neither has claimed) for supervised sessions. Gradually increase time together. Only move them into the breeding flight when they preen each other, sleep touching, and defend each other from you. This can take 3 months to a year. Patience prevents bitten toes and broken eggs.
Diet Conditioning for Breeding
Start conditioning 3-4 months before expected lay. The goal: optimal body weight, nutrient stores, and hormonal readiness. Base diet: high-quality pellets (60%), fresh vegetables (25%), fruits (5%), healthy seeds/nuts (10%). Add breeding supplements:
- Calcium with D3 (cuttlebone, mineral block, liquid calcium on food)
- Vitamin A rich foods (sweet potato, carrot, red pepper, dark leafy greens)
- Protein boost (cooked egg with shell, legumes, sprouted seeds)
- Omega-3s (flaxseed, chia, walnut pieces)
Monitor weight weekly. Hens should gain 5-10% body weight before laying. Obesity causes egg binding; underweight hens abandon clutches.
Creating the Perfect Breeding Environment
Environment triggers hormones. Get the cues right, and the birds do the rest. Get them wrong, and you wait another year.
Lighting: The Primary Trigger
Birds are photoreceptors with feathers. Their pineal gland reads day length and signals the reproductive system. In nature, Amazons breed when days reach 12-13 hours. Replicate this with full-spectrum avian lights on timers.
Program example:
- January: 10 hours light / 14 hours dark
- February: 11 hours light / 13 hours dark
- March: 12.5 hours light / 11.5 hours dark
- April-May: 13 hours light / 11 hours dark (peak breeding)
- June: 12.5 hours light / 11.5 hours dark
- July: 11 hours light / 13 hours dark
- August-December: 10 hours light / 14 hours dark (rest period)
Use dawn/dusk simulators (30-minute fade in/out). Sudden light changes stress birds. Lights must be full-spectrum (UVB/UVA) for vitamin D synthesis. Replace bulbs every 6-12 months; UV output degrades before visible light dims.
Temperature and Humidity Control
Maintain 70-80°F (21-27°C) year-round. Avoid drafts. Humidity 50-60% mimics tropical conditions and prevents egg desiccation. Low humidity dries membranes; chicks cannot pip. High humidity grows mold. Use a hygrometer. Mist the aviary lightly in the morning during breeding season to simulate rainy season.
The Nest Box: Critical Engineering
The nest box is where life happens. Amazons prefer deep, vertical boxes (grandfather style). Dimensions: 12×12 inches floor, 24-30 inches deep. Entrance hole 4-5 inches diameter, centered near top. Material: 3/4-inch exterior plywood or thick HDPE plastic. Metal conducts heat/cold; avoid.
Inside: ladder or hardware cloth stapled from entrance to floor so birds climb down, not fall. Substrate: 3-4 inches of pine shavings (not cedar, toxic) mixed with peat moss. This cushions eggs, absorbs moisture, and prevents splay leg. Replace substrate between clutches.
Mount box high on the back wall, outside the flight with entrance inside. This saves interior space and lets you inspect from outside via a hinged inspection door. Add a small perch below the entrance.
Did you know? A study in the Journal of Avian Medicine and Surgery found that nest boxes with internal ladders reduced chick mortality from falls by 78% compared to smooth-walled boxes.
Perches and Enrichment
Provide varied diameter natural wood perches (manzanita, dragonwood, java wood) for foot health. Place one high perch near the nest entrance for the male to guard. Add chewable enrichment (pine cones, palm fronds, balsa wood) to redirect destructive energy from the nest box. Rotate weekly. Bored Amazons destroy eggs.
Privacy and Security
Breeding pairs need visual barriers. Hang shade cloth or bamboo fencing on one or two sides of the flight. Limit human traffic. Use a baby monitor or camera to observe without entering. Stressed hens eject eggs or kill chicks. The male may attack the hen if he feels the territory is compromised.
From Egg to Hatch: The Incubation Period
Eggs appear. Now the real waiting game begins. Understanding the timeline helps you intervene only when necessary.
Egg Laying Pattern
Hens lay every other day. Typical clutch: 3-4 eggs (range 2-5). First eggs are often infertile or thin-shelled. Do not remove them. The hen needs the full clutch to begin serious incubation. She may not sit tightly until the second or third egg.
Candling: Checking Fertility
Candle at day 7-10 using a cool LED candler. Do this when both parents are eating (distract with high-value treats). Fertile eggs show a dark spot (embryo) with spider-web blood vessels. Infertile eggs glow clear yellow. Early dead embryos show a blood ring. Mark fertile eggs with pencil (date, number). Remove clearly infertile eggs after 14 days if the hen allows.
Incubation Roles
Both parents incubate. The hen does nights and most days. The male relieves her for feeding and preening breaks. He also feeds her at the nest entrance. Do not disturb this rhythm. Some first-time parents are clumsy. They may break eggs or fail to turn them. If eggs break repeatedly, consider pulling for artificial incubation (advanced, requires incubator with automatic turning, 99.5°F, 55% humidity).
Common Incubation Problems
Egg binding: Hen strains, tail pumps, sits fluffed, passes urates but no egg. Emergency. Warmth (85-90°F), humidity, liquid calcium orally, veterinary prostaglandin or oxytocin injection. Do not massage the abdomen. You can rupture the egg internally.
Thin shells: Calcium or vitamin D3 deficiency. Supplement immediately. Liquid calcium on soft food 3x daily. Full-spectrum light check.
Cracked eggs: Hairline cracks can be sealed with non-toxic white glue (Elmer’s) or nail polish on the crack only. Candle daily. Bacteria enter cracks; many sealed eggs still hatch.
The Hatch Process
Pip (first hole) to hatch takes 24-48 hours. Do not help. The chick absorbs yolk sac and learns to breathe. Intervening causes bleeding, yolk sac infection, or splay leg. You will hear faint peeping from inside the egg. Parents may vocalize back. This is imprinting beginning.
Chicks hatch wet and ugly. Parents eat shell membranes (calcium) and may eat infertile eggs. Leave them alone for 24 hours unless a chick is clearly neglected (cold, empty crop, not peeping).
Raising Chicks: Parent-Raised vs. Hand-Fed
This decision shapes everything. Parent-raised birds make better breeders. Hand-fed birds make better pets. You can do both: co-parenting (parents feed, you handle daily).
Parent-Raised Advantages
Parents teach species-specific behaviors, vocalizations, and social skills. Chicks develop stronger immune systems from crop flora transfer. Less work for you. But: parents may pluck chicks, underfeed, or abandon. First-time parents often fail. You must monitor crops daily (visual check from inspection door). Full crops look like a lump on the right neck side.
Hand-Feeding Protocol
Pull chicks at 14-21 days (eyes open, pin feathers emerging). Earlier pulls bond better but require more skill. Later pulls resist the syringe. You need: brooder (95°F day 1, drop 1°F daily), commercial hand-feeding formula (Kaytee Exact, Roudybush, or Hagen), syringes (10-35ml catheter tip), digital thermometer, gram scale, disinfectant.
Formula temperature: 105-110°F (40-43°C). Test on wrist like baby formula. Too hot burns crop; too cold causes crop stasis. Consistency: applesauce for young chicks, pudding for older.
Feeding schedule by age:
- Day 1-3: every 2 hours (6am-midnight), 1-2ml
- Day 4-7: every 3 hours, 3-5ml
- Week 2: every 4 hours, 8-12ml
- Week 3: every 5 hours, 15-20ml
- Week 4-5: 4x daily, 25-35ml
- Week 6-7: 3x daily, introduce weaning foods
- Week 8-10: 2x daily, mostly weaning foods
- Week 11-12: 1x daily, fully weaned
Weigh every morning before first feed. Healthy gain: 10-15% body weight daily first week, then steady. Weight loss two days in a row = vet visit.
Co-Parenting: The Best of Both Worlds
Leave chicks with parents. Handle 15-20 minutes, 2-3x daily from day 14. Weigh, check crop, socialize. Parents continue feeding. Chicks learn human trust and parrot skills. This requires tolerant parents. Some pairs attack hands near the nest. Assess your pair’s temperament.
Weaning: The Independence Phase
Weaning is not a date; it is a process. Offer weaning foods at 5-6 weeks: warm soaked pellets, chopped vegetables, fruit, sprouted seeds, birdie bread. Place in shallow dishes on brooder floor. Chicks play, explore, eventually eat. Do not force. Continue formula until chick refuses 2 consecutive feedings and maintains weight for 3 days.
Did you know? Force-weaning (stopping formula before the chick is ready) causes behavioral issues in 40% of birds, including screaming, plucking, and food insecurity, per a University of California Davis aviculture survey.
Health Management and Troubleshooting
Breeding birds and babies face specific health challenges. Prevention beats treatment every time.
Preventive Care Calendar
Monthly: Weigh all birds. Check droppings (color, consistency, volume). Inspect feet, beak, feathers. Clean nest box (between clutches only).
Quarterly: Fecal gram stain and parasite check. Beak/nail trim if needed.
Annually: Full veterinary exam with blood work. Vaccinate for Polyomavirus if in high-risk area (discuss with vet).
Common Breeding Complications
Splay leg: Chick legs splay outward, cannot stand. Cause: slippery nest substrate, nutritional deficiency, overcrowding. Fix: hobble legs with vet wrap (figure-8 between ankles) for 3-5 days. Deep shavings prevent recurrence.
Crop stasis/sour crop: Crop feels doughy, smells sour, chick regurgitates. Cause: formula too cold, too thick, bacterial/yeast overgrowth. Fix: empty crop (vet only), warm fluids, antifungal/antibiotic per vet. Prevent with strict temperature and hygiene.
Beak deformities (scissors beak, mandibular prognathism): Often genetic or incubation humidity issue. Mild cases: regular beak trims. Severe: euthanasia consideration. Do not breed affected birds.
Feather plucking in parents: Stress, boredom, nutritional deficit, or habit. Increase enrichment, check diet, add foraging. Neck collars (Elizabethan) last resort.
Nursery Hygiene
Hand-feeding equipment: wash in hot soapy water, soak 10 minutes in avian-safe disinfectant (F10, Oxyfresh, diluted bleach 1:32), rinse thoroughly. Fresh formula every feeding. Discard leftovers. Never reheat. Wash hands between clutches. Separate nursery air space from breeding birds if possible (prevents airborne disease spread).
When to Call the Vet
Emergency signs: labored breathing, bleeding, inability to stand, seizure, prolapse, egg binding, chick not gaining weight 48 hours, parent attacking chicks. Better a false alarm than a dead bird. Build a relationship with your avian vet before you need them at 2 AM.
Socialization, Placement, and Legal Responsibilities
Your job is not done when the bird eats on its own. The next 8-12 weeks determine if this parrot becomes a cherished companion or a rescue statistic.
Critical Socialization Windows
Weeks 4-12: fear imprinting period. Expose chicks to: different people (ages, genders, hats, glasses), household sounds (vacuum, phone, TV), other pets (supervised), car rides in carriers, towels (for vet exams), nail files, wing touches. Keep sessions short, positive, frequent. A chick that fears hands at 8 weeks fears hands for life.
Flight Training Before Clipping
Let them fledge. Flight develops confidence, coordination, and respiratory health. Clip only after 2-3 weeks of strong flight, and only if the future home requires it. Many owners now keep flighted birds with safe environments. Educate buyers.
Screening Buyers
You are responsible for every life you create. Screen thoroughly: application, references, home photos/video, vet reference, contract with return clause (bird comes back to you, not a shelter). Red flags: first bird owner wanting a “talking” Amazon, no avian vet, all-day-work schedule with no plan, rental without pet permission, children under 10.
Provide a starter kit: 2 weeks food, favorite toys, perch, care guide, hatch certificate, vet records, your phone number for lifetime support.
Legal and Ethical Obligations
Check local laws. Some cities restrict parrots. Some states require breeder permits. CITES Appendix II covers all Amazons; interstate commerce needs documentation. Band babies with closed, traceable bands (size 11-12 for most Amazons) at 10-14 days. Keep detailed records: hatch date, parents, band number, weight chart, medical notes, buyer info.
Ethically: do not overproduce. The market is saturated with unwanted parrots. Breed 1-2 clutches per year per pair. Give hens a full rest year after 2 clutches. Retire pairs at 20-25 years or if health declines. Never sell to brokers, pet stores, or anyone who will flip the bird.
Advanced Tips from Seasoned Breeders
These insights come from breeders with 20+ years experience. They separate consistent producers from lucky amateurs.
Record Keeping Systems
Use a dedicated notebook or software (ZIMS, AviManage, or simple spreadsheet). Track: pair ID, hatch dates, egg numbers, fertility, hatch rates, chick weights daily, formula amounts, medications, band numbers, buyer contacts. Patterns emerge over years. You will see which pairs produce talking birds, which lines have health issues, which diet tweaks improve hatch rates.
Multiple Clutch Management
Some pairs double clutch (lay again after first clutch leaves). Allow this only if hen is in excellent condition. Pull first clutch for hand-feeding at 14 days. Pair may recycle in 3-4 weeks. Limit to 2 clutches/year. Third clutch depletes calcium reserves dangerously.
Fostering Between Pairs
If one pair has infertile eggs and another has too many chicks, foster eggs or day-old chicks. Match developmental stages closely. Slip foster eggs under sitting hen at night. For chicks, rub with nest substrate from foster nest to transfer scent. Monitor acceptance for 2 hours. Works best with experienced parents.
Seasonal Rest Is Non-Negotiable
After breeding season (August), pull nest boxes. Return to 10-hour days. Reduce rich foods. Let birds molt, recover, be parrots. Pairs bred year-round burn out in 3-4 years. Pairs rested annually breed productively for 20+ years. Think marathon, not sprint.
Building a Mentor Network
Join the American Federation of Aviculture, local bird clubs, species-specific Facebook groups (moderated, science-based). Find a mentor 5+ years ahead of you. Pay for their time. Attend conferences (AFA, Exotic Bird Expo). The $500 conference fee saves $5,000 in mistakes.
Conclusion
Breeding Amazon parrots is a commitment measured in decades, not seasons. Each decision, from the first introduction to the final home visit, ripples through the life of a bird that may outlive you. The work is exacting. The schedule is relentless. The heartbreak is real when things go wrong.
But the rewards? Hearing a 6-month-old Yellow-naped say “I love you” in your voice. Watching a once-fearful buyer send photos of their Amazon riding a toy motorcycle. Knowing you added genetically diverse, behaviorally sound birds to a species losing ground in the wild. That is why we do it.
Start small. Learn constantly. Respect the birds. Find your tribe. And never, ever stop asking “what is best for this parrot?” If you keep that question central, the rest follows.
Your first fertile egg is waiting. Go build that nest box.
Frequently Asked Questions
At what age do Amazon parrots start breeding?
Amazon parrots typically reach sexual maturity between 3-6 years old depending on the species. Smaller species like White-fronted Amazons may breed at 3 years, while larger species like Double Yellow-headed Amazons often need 5-6 years. Breeding before full maturity risks health complications and poor parenting.
How many eggs do Amazon parrots lay?
Amazon parrots typically lay 3-4 eggs per clutch, with a range of 2-5 eggs. The hen lays one egg every other day. First-time layers may produce smaller clutches or infertile eggs. Clutch size varies by species, age, nutrition, and individual bird.
How long do Amazon parrot eggs take to hatch?
Amazon parrot eggs incubate for 24-28 days. Both parents share incubation duties, with the hen sitting nights and most of the day. The male relieves her for feeding breaks. Hatching (pip to emergence) takes 24-48 hours once the chick breaks the shell.
When should I pull chicks for hand-feeding?
Pull chicks for hand-feeding at 14-21 days old, when eyes are open and pin feathers are emerging. Earlier pulls (10-14 days) bond more easily but require expert skills. Later pulls (3+ weeks) may resist syringe feeding. Co-parenting (daily handling while parents feed) is an excellent middle ground.
What temperature should hand-feeding formula be?
Hand-feeding formula must be 105-110°F (40-43°C). Test on your inner wrist like baby formula. Temperatures above 110°F can burn the crop; below 105°F causes crop stasis and poor digestion. Use a digital thermometer for every feeding. Never microwave formula (creates hot spots).
Do I need a license to breed Amazon parrots?
Licensing requirements vary by location. All Amazon parrots are CITES Appendix II, requiring documentation for interstate/international commerce. Many states require breeder permits for selling birds. Some cities restrict parrot ownership entirely. Check your state wildlife agency, USDA, and local ordinances before breeding.