Building a custom aviary for African Gray Parrots gives your intelligent birds the space and stimulation they need to thrive. This comprehensive guide walks you through every step from planning and materials to final safety checks.
Key Takeaways
- Minimum size matters: African Gray Parrots need at least 8 feet long, 4 feet wide, and 6 feet tall for a pair to fly and exercise properly.
- Stainless steel mesh is essential: Use 16-gauge or heavier stainless steel with 1-inch spacing to prevent escape and resist powerful beaks.
- Location affects health: Place the aviary where birds get morning sun, afternoon shade, and protection from drafts, predators, and toxic fumes.
- Enrichment prevents boredom: Include multiple perch types, foraging stations, bathing areas, and rotating toys to stimulate these highly intelligent birds.
- Double-door safety systems prevent escapes: Install an airlock entry with two doors that never open simultaneously.
- Drainage and cleaning access save time: Design a sloped floor with a central drain and removable panels for easy daily maintenance.
- Regular inspections catch problems early: Check mesh integrity, perch stability, and hardware monthly to keep your birds safe long-term.
Introduction
African Gray Parrots are among the most intelligent birds on the planet. They solve puzzles, mimic human speech with uncanny accuracy, and form deep emotional bonds with their caregivers. But their brilliance comes with a catch. These birds need space. Lots of it. A standard cage simply cannot meet the physical and psychological needs of an African Gray. That is where a custom-built aviary changes everything.
In this guide, you will learn how to build an aviary for African Gray Parrots from the ground up. We cover every detail: choosing the right location, calculating dimensions, selecting bird-safe materials, constructing a predator-proof frame, installing proper mesh, designing an enriching interior, and adding critical safety features. Whether you are a seasoned DIYer or a first-time builder, these steps will help you create a sanctuary your birds will love for decades.
Building your own aviary saves money compared to commercial options. It also lets you customize every inch for your specific birds and your specific space. Let us start with the most important decision of all: planning.
Step 1: Planning and Designing Your Aviary
Every successful build begins on paper. Skipping the planning phase leads to costly mistakes, unsafe conditions, and frustrated birds. Take your time here. Measure twice. Build once.

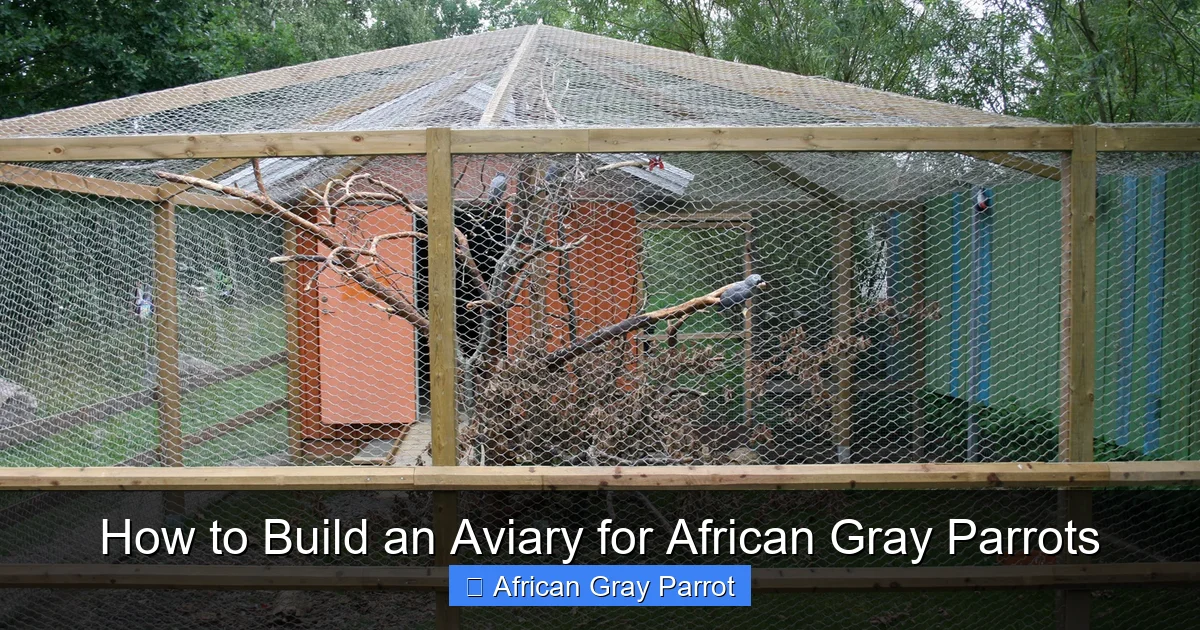
Visual guide about How to Build an Aviary for African Gray Parrots
Image source: zoochat.com
Determine the Right Dimensions
African Gray Parrots are medium-sized parrots with a wingspan of 18 to 20 inches. They need horizontal flight space more than vertical height. The absolute minimum for a single bird is 6 feet long, 3 feet wide, and 5 feet tall. For a pair, you need at least 8 feet long, 4 feet wide, and 6 feet tall. Bigger is always better. If your yard allows, aim for 12 feet long, 6 feet wide, and 7 feet tall. This gives your birds true flight paths and room for extensive enrichment.
Draw your design to scale on graph paper. One square equals six inches. Mark every door, window, perch, feeding station, and drain. Note the sun path across your yard throughout the year. This drawing becomes your blueprint and your material shopping list.
Choose Between Freestanding and Attached Designs
A freestanding aviary sits independently in your yard. It offers 360-degree access for cleaning and maximum placement flexibility. An attached aviary connects to your home, often accessible through a window or door. This lets birds move between indoor and outdoor spaces. Attached designs save one wall of materials but require careful sealing against weather and pests. Freestanding designs are simpler for first-time builders. We will focus on a freestanding rectangular design in this guide.
Plan for Zoning and Permits
Check your local zoning laws and HOA rules before buying a single screw. Some municipalities classify aviaries as accessory structures requiring permits. Others restrict height, setback distances, or noise levels. African Gray Parrots can be loud. Their contact calls carry. Talk to neighbors early. A friendly heads-up prevents complaints later. Get written approval if required. Keep all paperwork with your build records.
Budget Realistically
A quality 8x4x6 foot aviary costs $2,000 to $4,000 in materials alone. Stainless steel mesh is the biggest expense. Pressure-treated lumber, concrete, hardware, roofing, and enrichment items add up. Budget 20% extra for unexpected costs. Tools you may need: circular saw, drill, impact driver, level, tape measure, post-hole digger, concrete mixer or wheelbarrow, wire cutters, hog ring pliers, and safety gear. Borrow or rent what you do not own.
Step 2: Choosing the Perfect Location
Location determines your birds’ health, safety, and happiness. A beautiful aviary in the wrong spot fails your birds. Walk your property at different times of day. Take notes. Photos help.
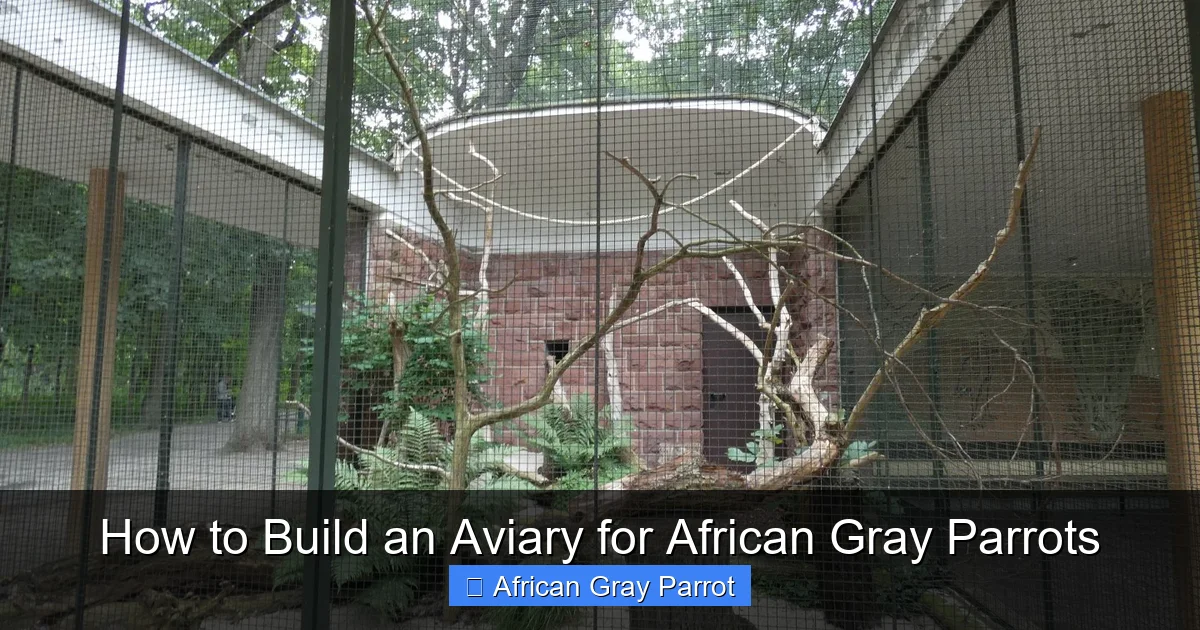
Visual guide about How to Build an Aviary for African Gray Parrots
Image source: zoochat.com
Sun Exposure and Shade Balance
African Gray Parrots need sunlight for vitamin D synthesis and feather health. Morning sun is ideal. It warms birds after cool nights without overheating risk. Afternoon shade is mandatory. In summer, direct afternoon sun can push aviary temperatures past 100 degrees Fahrenheit. Heat stress kills parrots fast. Position the aviary where trees, buildings, or shade cloth block the hottest rays. If natural shade is lacking, plan for 70% shade cloth over the roof and west-facing wall.
Wind and Weather Protection
Prevailing winds carry dust, debris, and disease. They also chill wet birds after bathing. Identify your dominant wind direction. Place the solid back wall of the aviary facing that direction. The front and sides stay open mesh for airflow. In hurricane or tornado zones, add extra anchoring and consider a design that can be partially dismantled before storms.
Drainage and Ground Conditions
Standing water breeds bacteria, mosquitoes, and fungus. Choose a slightly elevated spot with natural drainage. Avoid low spots, clay soil, and areas near downspouts. If the ground is flat, you will build a raised floor with a slope. More on that in Step 4. Test drainage by digging a 12-inch hole, filling with water, and timing how fast it drains. Under one hour is good. Over four hours means you need significant site prep.
Predator Awareness
Raccoons, opossums, rats, snakes, hawks, and neighborhood cats all target parrots. Raccoons are the worst. They have thumbs. They unlatch doors. They reach through mesh. They tear weak spots. Your location should be visible from your house for monitoring. Motion-activated lights deter nocturnal predators. A buried hardware cloth apron prevents digging. We cover predator proofing in detail in Step 5.
Accessibility for You
You will visit this aviary daily. Twice daily minimum. Carry food, water, cleaning supplies, and enrichment items. The path from your door to the aviary should be level, well-lit, and non-slip in rain or ice. A nearby water spigot saves endless hose dragging. Electrical access lets you add heated perches, fans, or cameras later. Plan for a wheelbarrow-width path at minimum.
Toxic Plant and Chemical Check
Scan a 20-foot radius for toxic plants. Oleander, avocado, rhododendron, yew, and many common landscaping plants kill parrots. Remove them or relocate the aviary. Check for pesticide drift from neighbors’ lawns. Ask neighbors about their lawn care schedule. Avoid areas where mosquito fogging occurs. Chemical sensitivity in parrots is extreme. One exposure can be fatal.
Step 3: Selecting Bird-Safe Materials
Material choice determines whether your aviary lasts five years or twenty-five. It also determines whether your birds stay healthy or suffer heavy metal poisoning, entanglement, or escape. African Gray Parrots test everything with their beaks. They are destructive investigators. Every material must pass the beak test.
Frame Materials: Wood vs. Metal
Pressure-treated lumber is the most common choice. It resists rot, insects, and weather. Use only ground-contact rated lumber for posts. Above-ground rated for horizontal members. Modern treatments use copper azole or micronized copper. These are safer than old arsenic-based CCA. Still, seal all cut ends with copper naphthenate. Paint or stain the exterior with low-VOC, bird-safe exterior paint. Never use creosote, pentachlorophenol, or lead-based products.
Galvanized steel pipe or aluminum framing lasts longer and eliminates chewing risk. Powder-coated aluminum is lightweight, rust-proof, and non-toxic. Steel pipe requires welding skills. Aluminum can be bolted. Both cost more upfront but save replacement labor. If using wood, expect to replace horizontal rails every 7 to 10 years as parrots chew them.
Mesh: The Critical Choice
This is where most builders fail. Chicken wire, hardware cloth, and welded wire from big-box stores are dangerous. They are galvanized after welding. Zinc coating flakes off. Parrots ingest flakes. Zinc toxicity causes neurological damage, immune suppression, and death. The mesh spacing is also wrong. One-inch hexagonal chicken wire lets parrots stick heads through. Half-inch hardware cloth traps toes.
Use only 16-gauge or 14-gauge stainless steel welded wire mesh. Grade 304 for most climates. Grade 316 for coastal areas with salt spray. Mesh opening: 1 inch by 1 inch or 1 inch by 2 inch. The 1×2 rectangle reduces material cost while preventing head entrapment. Stainless steel resists beaks, weather, and time. It costs 4 to 6 times more than galvanized. It is worth every penny. Buy from specialty aviary suppliers, not hardware stores.
Roofing Options
Solid roofing on at least 50% of the top is non-negotiable. Birds need dry refuge. Options: corrugated polycarbonate panels (clear or tinted), metal roofing panels, or asphalt shingles on plywood sheathing. Polycarbonate lets light through while blocking UV. It is lightweight and easy to cut. Metal roofing reflects heat but can be loud in rain. Add insulation blanket underneath if using metal. Shingles look great but add weight requiring stronger framing. Slope the roof at least 3:12 for drainage. Overhang walls by 12 inches minimum to keep rain off mesh.
Flooring Materials
Concrete is the gold standard. It is predator-proof, drainable, sanitizable, and permanent. Pour a 4-inch slab with 6×6 welded wire reinforcement. Slope 1/4 inch per foot toward a central floor drain connected to a gravel pit or sewer line. Add a broom finish for traction. Seal with bird-safe concrete sealer.
Alternative: compacted gravel base with pavers. Easier to install. Harder to clean. Not fully rodent-proof. If using this method, lay 1/4-inch hardware cloth under the gravel as a dig barrier. Extend 24 inches past walls.
Never use bare dirt, sand, or wood chips as primary flooring. They harbor bacteria, parasites, and fungus. They cannot be sanitized. They allow predator digging.
Hardware and Fasteners
Stainless steel screws, bolts, washers, and nuts. Grade 304 minimum. No exceptions. Galvanized hardware rusts. Rust creates sharp edges and tetanus risk. Zinc from galvanizing contaminates birds. Pre-drill all holes to prevent wood splitting. Use washers under every bolt head and nut. Lock washers or nylon-insert lock nuts prevent vibration loosening. For mesh attachment, use stainless steel hog rings or stainless steel staples with 1-inch crown. Space every 2 inches along frames.
Door Hardware
Heavy-duty stainless steel hinges. Ball-bearing for smooth operation. Padlock hasps on every door. Keyed-alike padlocks so one key opens all. Slide bolts as secondary locks. Spring-loaded gate latches that self-close. Test every latch with one hand. You will often carry supplies in the other.
Step 4: Building the Foundation and Frame
With materials on site and location prepped, construction begins. Work methodically. Check level, square, and plumb at every stage. A crooked frame means doors that bind, gaps predators exploit, and roof leaks.
Prepare the Site
Mark your footprint with string lines and batter boards. Verify square by measuring diagonals. They must be equal. Remove grass and topsoil to 6 inches depth. Compact subsoil with a plate compactor. Add 4 inches of crushed stone (3/4 inch minus). Compact again. This base prevents settling.
Pour the Concrete Slab
Build forms from 2×6 lumber. Stake securely. Place 6×6 welded wire mesh on chairs to center it in the slab. Install PVC sleeve for floor drain at low point. Slope forms 1/4 inch per foot toward drain. Order 3000 PSI concrete with fiber reinforcement. Pour, screed, float, broom finish. Cut control joints every 8 feet. Cover with plastic. Cure 7 days before framing. Keep moist.
Set Corner Posts
Use 6×6 pressure-treated posts for corners. 4×4 for intermediate posts if span exceeds 8 feet. Set in post bases anchored to concrete with 1/2-inch stainless steel wedge anchors. Check plumb in both directions. Brace temporarily. Posts extend 7 feet above slab for 6-foot interior height plus roof slope.
Install Horizontal Rails
Top plates: double 2×6 around perimeter. Lap corners. Bolt through posts with 1/2-inch stainless carriage bolts, washers, nuts. Space bolts 24 inches on center. Mid-rails at 3 feet and 5 feet height for mesh attachment points. Bottom plate pressure-treated 2×6 bolted to slab with 3/8-inch wedge anchors every 32 inches. Use sill sealer foam under bottom plate.
Frame Door Openings
Main entry: 36 inches wide, 72 inches tall. Double-door airlock: two 36-inch doors with 4-foot vestibule between. Frame each door opening with doubled 2×6 jambs. Header: double 2×8. King studs and jack studs standard framing. Secondary access door: 30 inches wide for cleaning access. Pre-hang doors in frames to check swing clearance before mesh installation.
Roof Framing
Rafters: 2×6 on 24-inch centers. Birdsmouth cut over top plates. Ridge beam: 2×8 or 2×10 depending on span. Hurricane ties at every rafter-to-plate connection. Collar ties at 4-foot height to prevent spread. Purlins 2×4 flat on 24-inch centers for polycarbonate panel support. Overhang: 12 inches minimum all sides. Fascia and soffit boards close eaves. Vented soffit allows airflow while excluding predators.
Square and Brace
Before mesh, verify everything. Diagonals equal. Walls plumb. Rails level. Doors swing free. Add temporary diagonal bracing. Permanent knee braces at corners: 2×4 at 45 degrees from post to top plate. Bolted both ends. This racking resistance is critical in wind.
Step 5: Installing Mesh and Roofing
This step transforms a frame into a secure enclosure. Patience here prevents escapes and injuries. Work with a partner. Mesh is awkward alone.
Attach Mesh to Frame
Start at a bottom corner. Roll mesh vertically. Align bottom edge with bottom plate. Secure with stainless hog rings every 2 inches using hog ring pliers. Pull tight as you go. No sag. No gaps over 1/4 inch at corners. Overlap seams by 2 inches minimum. Hog ring overlaps every inch. Cover every inch of frame. No exposed wood edges. Parrots chew exposed edges.
At doors, wrap mesh around jambs. Overlap door frame by 1 inch. This prevents gap when door closes. Test door swing after each side. Adjust before final tightening.
Install the Buried Apron
This stops digging predators. Extend 1/2-inch stainless steel hardware cloth (not the main mesh) 24 inches outward from bottom plate. Bend 90 degrees at wall. Lay flat on gravel base. Cover with 4 inches of soil or pavers. Secure to bottom plate with stainless staples every 4 inches. This apron is your insurance policy. Do not skip it.
Roof Panel Installation
Polycarbonate panels: pre-drill holes 1/8 inch larger than screws to allow expansion. Use neoprene washer screws. Space 12 inches on center. Overlap panels one corrugation. Seal overlap with silicone. Ridge cap covers peak. Flashing at wall connections. Gutters optional but recommended to divert water from entry.
If using metal roofing: same fastening pattern. Add closure strips at eaves and ridge to block birds and insects. Insulation blanket under panels reduces heat gain and rain noise.
Seal All Gaps
Inspect every junction. Mesh to frame. Mesh to mesh. Mesh to door frames. Roof to walls. Foundation to walls. Seal with bird-safe polyurethane sealant. Smooth with finger. Parrots pick at sealant. Make it inaccessible or use stainless steel cover strips over sealed joints.
Step 6: Creating an Enriching Interior Environment
An empty aviary is a prison. A furnished aviary is a home. African Gray Parrots need complexity. They forage, climb, bathe, chew, solve problems, and socialize. Your interior design must support all these behaviors.
Perch Variety and Placement
Provide at least 5 perches of different diameters, textures, and orientations. Natural branches: manzanita, dragonwood, java wood, grapevine. Diameters 1 to 2.5 inches. Irregular shapes exercise feet. Prevent bumblefoot. Place perches at multiple heights. Horizontal, diagonal, vertical. One high roosting perch in sheltered corner. One near food. One near water. One in flight path. No perch directly above another. Droppings contaminate lower perches.
Secure branches with stainless steel bolts through branch into frame. Or use stainless eye bolts in frame with quick-links for removable perches. Removable allows cleaning and rotation. Never use dowel rods. Uniform diameter causes pressure sores.
Feeding Stations
Multiple stations reduce resource guarding. Minimum two for a pair. Three for three birds. Elevated platforms with raised edges contain mess. Stainless steel bowls in holders. One for pellets, one for fresh chop, one for water. Water bowls: heavy ceramic or stainless with wide base. Clean twice daily. Add a water bottle as backup. Foraging stations: PVC pipe puzzles, skewers, puzzle feeders. Rotate daily.
Bathing Area
African Gray Parrots love water. Provide a shallow concrete basin 24 inches diameter, 3 inches deep, with textured bottom. Plumbed with drain valve. Or a large heavy plant saucer on a platform. Mist system on timer: 5 minutes morning, 5 minutes afternoon in hot weather. Birds choose when to bathe. Never force. Dry perches nearby for preening.
Shelter and Privacy
Even outdoor birds need retreat. Install a nest box or shelter box: 18x18x24 inches, entrance 5 inches diameter. Mount high in corner. Insulated roof. Clean-out door. This is not for breeding. It is for security. Add visual barriers: bamboo screens, shade cloth panels, or dense non-toxic plants in pots. Birds need to escape each other’s gaze.
Toys and Enrichment Rotation
African Gray Parrots destroy toys. This is good. It is natural. Budget $50 monthly for toys. Categories: shreddable (paper, palm, balsa), manipulative (puzzle, nuts/bolts), foot toys (small items to hold), noise makers (bells, rattles), foraging (hidden food). Rotate weekly. Introduce new items outside aviary first. Watch for fear. Some birds fear new objects. Desensitize slowly.
Planting Inside and Around
Non-toxic plants add oxygen, humidity, and beauty. Safe: bamboo, areca palm, spider plant, Boston fern, hibiscus, rose (no pesticides), magnolia, bottlebrush. In pots for mobility. Large pots on casters. Protect roots with wire mesh. Birds will dig. Avoid toxic: avocado, oleander, rhododendron, philodendron, pothos, dieffenbachia, and hundreds more. When in doubt, leave it out.
Step 7: Safety Systems and Finishing Touches
Safety systems separate a hobby project from a professional aviary. These features protect your birds when you are not watching. They are not optional.
Double-Door Airlock Entry
This is the single most important escape prevention feature. Build a 4-foot deep vestibule between outer and inner doors. Both doors self-close with spring hinges. Both have slide bolts and padlock hasps. Protocol: open outer door, enter, close outer door, verify closed, open inner door, enter aviary, close inner door. Never both open. Train everyone. Post signage.
Predator Proofing Details
Raccoons reach through 1-inch mesh. They grab toes, wings, heads. Install a 2-foot tall “raccoon guard” around bottom exterior: 1/2-inch hardware cloth or solid metal flashing. Extend up from ground. Secure with stainless screws every 6 inches. Cover all roof vents with 1/4-inch hardware cloth. Snakes enter small gaps. Seal every penetration. Conduit, pipes, drains. Use stainless steel escutcheon plates.
Fire Safety
Mount ABC fire extinguisher at entry. Smoke detector inside aviary (dust-resistant model). Heat detector near electrical. No open flames. No heat lamps unless ceramic emitters in wire cages. Electrical: GFCI protected. Conduit all wiring. Outdoor-rated fixtures. Bury cable 18 inches or run in conduit on exterior.
Emergency Catch System
Despite precautions, escapes happen. Have a plan. Keep a large soft net (36-inch hoop) at entry. Towel for restraint. Carrier ready. Microchip your birds. Register chips. Photos of unique markings. Neighbor contact list. Practice catching. It is a skill.
Lighting and Climate Control
Full-spectrum LED lighting on timer: 12 hours on, 12 off. Mimics equatorial photoperiod. African Gray Parrots originate near equator. They need consistent day length. Winter: heated perches (thermostatically controlled). Summer: misting system, fans (enclosed blades), shade cloth. Thermometer and hygrometer at bird level. Target 65-80 degrees Fahrenheit, 40-60% humidity.
Cleaning Systems
Daily: remove droppings trays, wash bowls, spot clean perches. Weekly: pressure wash floor, scrub perches, disinfect toys. Monthly: deep clean mesh, inspect hardware, rotate enrichment. Design for this. Removable droppings trays under roosts. Hose bib inside aviary. Squeegee for polycarbonate roof. Leaf blower for dry debris.
Monitoring and Documentation
WiFi camera with night vision. Monitor from phone. Check birds without disturbing. Log book: weights weekly, behavior notes, vet visits, enrichment rotation, maintenance tasks. Patterns emerge. Early illness detection saves lives. African Gray Parrots hide illness. Weight drop of 5% is emergency.
Troubleshooting Common Issues
Even well-built aviaries develop issues. Here are solutions to the most frequent problems.
Birds Chewing Frame
African Gray Parrots chew wood. It is instinct. If they target structural members, wrap those areas with stainless steel flashing or hardware cloth. Provide more acceptable chewing outlets: pine cones, balsa wood, palm strips, phone books. Increase foraging complexity. Bored birds destroy. Busy birds build.
Mesh Fatigue at Stress Points
Check monthly where mesh meets frame, especially corners and door edges. Hog rings fail. Replace immediately. Keep spare hog rings and pliers on site. Stainless mesh lasts decades but fasteners are the weak link.
Condensation and Mold
In humid climates, condensation forms on roof panels. Drips on birds. Solution: insulation blanket under roof. Ventilation gaps at peak and eaves. Dehumidifier in shelter box. Wipe down weekly with vinegar solution (1:10). Rinse well.
Rodent Intrusion
Mice enter 1/4-inch gaps. Rats chew through wood. If you see droppings, act fast. Seal every gap with stainless steel wool and caulk. Set snap traps outside aviary only. Never poison. Secondary poisoning kills parrots. Check apron integrity. Repair breaches.
Aggression Between Birds
Even bonded pairs fight. Provide visual barriers. Separate feeding stations. Extra perches. If blood drawn, separate immediately. Hospital cage ready. Reintroduce slowly. Side-by-side in carrier. Supervised time. Some pairs never reconcile. Have backup housing plan.
Noise Complaints
African Gray Parrots are loud. Contact calls reach 90 decibels. Morning and evening chorus is normal. Mitigate: solid wall facing neighbors. Dense landscaping buffer. White noise fountain. Bring birds in at night if indoor space allows. Communicate with neighbors. Share fresh eggs if you have chickens. Goodwill matters.
Conclusion
Building an aviary for African Gray Parrots is a labor of love. It demands planning, investment, and sweat. But the reward is immeasurable. You give your birds the gift of flight, sunshine, rain, breeze, and choice. You watch them forage, bathe, climb, and simply be parrots. Their feathers gleam. Their eyes brighten. Their voices strengthen.
This guide gave you the roadmap. Every step matters. Skimping on mesh gauge risks zinc poisoning. Skipping the apron invites raccoons. Ignoring enrichment creates feather pluckers. But doing it right creates a sanctuary that lasts generations. Your grandchildren may watch these same birds in this same aviary. African Gray Parrots live 50 to 70 years. Build for that timeline.
Start with the plan. Order the stainless mesh. Dig the first post hole. One step at a time. Before you know it, you will stand inside your finished aviary, hearing the contented chatter of birds who finally have the home they deserve. That moment makes every hour worthwhile.
Welcome to the flock.