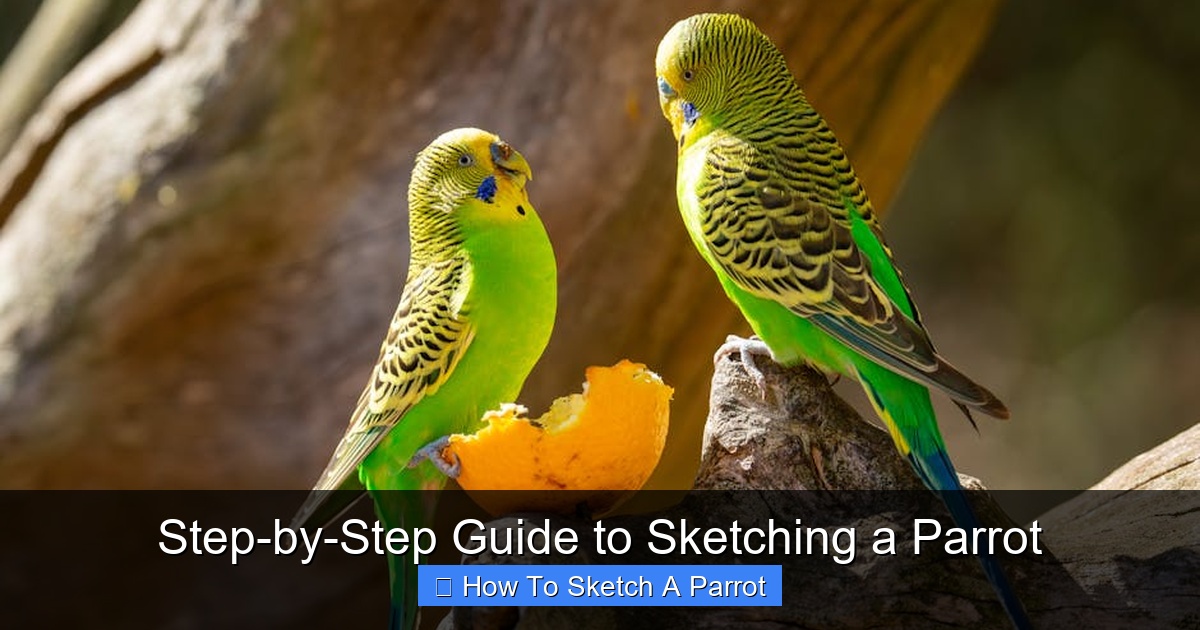
Featured image for this comprehensive guide about How to Sketch a Parrot
Welcome, aspiring artists and parrot enthusiasts! Have you ever gazed upon the vibrant plumage and intelligent eyes of a parrot and wished you could capture that beauty on paper? Sketching is not just about replicating what you see; it’s about understanding form, light, and personality, bringing a subject to life with your own hands. Parrots, with their diverse species, striking colors, and often cheeky expressions, offer a truly captivating challenge for any artist. Whether you’re a seasoned sketcher looking for a new subject or a complete beginner eager to try, learning how to sketch a parrot can be an incredibly rewarding journey.
The intricate details of a parrot’s feathers, the curve of its powerful beak, and the piercing gaze of its eyes all contribute to its unique charm. This comprehensive guide is designed to break down the process of sketching a parrot into manageable, step-by-step instructions. We’ll explore everything from essential tools and understanding parrot anatomy to advanced shading techniques and troubleshooting common artistic hurdles. Get ready to transform your blank canvas into a stunning representation of these magnificent birds.
By the end of this tutorial, you’ll not only have a beautiful parrot sketch but also a deeper appreciation for the artistry involved in capturing nature’s wonders. So grab your pencils, find a comfortable spot, and let’s embark on this exciting artistic adventure together. Unleash your inner artist and discover the joy of drawing a parrot!
📋 Table of Contents
- Gathering Your Artistic Arsenal: Essential Tools for Sketching a Parrot
- Deconstructing Parrot Anatomy: The Foundation of Your Sketch
- Bringing the Parrot to Life: Key Features & Details
- Mastering Value and Texture: Adding Depth to Your Sketch
- Advanced Techniques & Personalizing Your Parrot Sketch
- Common Challenges & Troubleshooting Your Parrot Sketch
- Parrot Feature Quick Reference & Value Guide
- Conclusion: Your Journey to Mastering the Art of Sketching Parrots
Gathering Your Artistic Arsenal: Essential Tools for Sketching a Parrot
Before you even begin to think about lines and shadows, having the right tools is paramount. Just as a chef needs quality ingredients, an artist thrives with appropriate materials. While you don’t need to break the bank, investing in a few good quality basics will significantly enhance your parrot drawing guide experience. Remember, the goal is to make the process enjoyable and effective, setting you up for success in sketching a parrot.
Must-Have Sketching Materials
- Graphite Pencils: A range of pencils from hard (H) to soft (B) is crucial.
- 2H or H: For light, initial construction lines and delicate details.
- HB: Your all-rounder, great for general sketching and mid-tones.
- 2B to 4B: For darker values, shading, and adding depth.
- 6B or higher: For the darkest shadows and creating strong contrast.
- Erasers:
- Kneaded Eraser: Excellent for lifting graphite, lightening areas, and shaping without leaving crumbs. It’s gentle on paper and a must-have for subtle corrections when you sketch a parrot.
- Plastic/Vinyl Eraser: For more precise or stronger erasing.
- Sketchbook/Paper: Opt for good quality drawing paper with a slight tooth (texture) that can hold graphite well. A smooth paper might make blending difficult, while overly rough paper can eat up your pencils too quickly. Consider acid-free paper for longevity.
- Blender/Stumps/Tortillons: These paper tools help blend graphite for smooth transitions, especially useful for the soft texture of feathers or the roundness of the parrot’s body. A cotton swab or even your fingertip can also work in a pinch, but be mindful of oils from your skin.
- Reference Images: This is perhaps the most critical “tool.” Finding high-quality photos of the specific parrot species you wish to draw is essential. Look for images that show clear details, good lighting, and interesting poses.
Selecting Your Parrot Reference Images
The quality of your reference material directly impacts the quality of your sketch. Don’t just pick any random parrot picture. Spend time finding images that will inspire and guide you. When learning how to draw a parrot, consider these points:
| Sketching Focus Area | Key Anatomical Observation for Sketching | Relevance to Parrot Care & Health |
|---|---|---|
| Head & Beak | Observe beak shape, size, curve, and nostril placement. Note any irregularities. | Helps identify species and age; abnormalities like overgrowth, flaking, or nasal discharge can indicate health issues. |
| Eyes & Cere | Note iris color, pupil dilation, and clarity. For some species, observe cere color and texture. | Eye brightness and pupil changes reflect mood, alertness, and overall health. Discolored or crusty ceres might signal respiratory problems. |
| Body Shape & Posture | Sketch the overall silhouette, wing/tail proportion, and how the parrot holds itself (e.g., hunched, alert, relaxed). | Reveals comfort levels, stress, or potential illness (e.g., fluffed feathers, lethargic or slumped posture are red flags). |
| Feathers & Color | Focus on feather layering, direction of growth, primary colors, subtle gradients, and texture. | Plumage quality indicates diet and general health (e.g., dull, brittle, or discolored feathers). Specific patterns aid species-specific care. |
| Feet & Claws | Observe how they grip, the scale patterns on the legs, and the length/condition of the nails. | Assesses perching ability; overgrown nails, dry/peeling scales, or difficulty gripping can signal husbandry issues or health concerns like arthritis. |
- Clear Details: Can you clearly see the texture of the feathers, the details of the eye, and the shape of the beak?
- Good Lighting: References with clear light and shadow areas will help you understand form and add depth to your drawing. Avoid overly flat or overly harsh lighting.
- Variety of Poses: Start with a side profile for easier anatomical understanding, then challenge yourself with front views or dynamic poses.
- Different Species: Parrots come in an astonishing array of shapes and sizes, from tiny lovebirds to majestic macaws. Each species has unique features that make drawing exotic birds a delightful adventure.
For instance, a Scarlet Macaw reference will demand focus on its bold primary colors and long tail, while a Cockatoo requires attention to its distinctive crest and softer, more uniform feather texture. Collecting a few different references allows you to pick and choose the best angles and details.
Deconstructing Parrot Anatomy: The Foundation of Your Sketch
Before you dive into intricate feather patterns, it’s crucial to understand the underlying structure. Think of it like building a house – you need a solid framework before you add the walls and decor. Understanding parrot anatomy for artists will allow you to create a believable and balanced sketch, even if you are aiming for a stylized look. This foundational step is key to a successful parrot art tutorial.
Breaking Down the Parrot into Basic Shapes
Every complex form can be simplified into basic geometric shapes. This is the secret to getting proportions right. When you sketch a parrot step-by-step, begin with these:
- The Body (Torso): Usually an oval or an egg shape. This is the largest part and sets the overall size.
- The Head: A circle or a slightly squashed oval, depending on the species. Connect it to the body with a short, thick neck shape.
- The Beak: A prominent, curved shape. It’s often triangular or cone-like at its base, curving sharply. Pay close attention to its upper and lower mandibles.
- The Wings: Typically teardrop or elongated oval shapes. They usually rest close to the body, following its curve.
- The Tail: Depending on the species, this can range from short and fan-like to very long and tapering. Start with a simple wedge or elongated rectangle.
- The Legs and Feet: Relatively small in comparison to the body. Start with simple stick lines to indicate position, then add the grasping talons. Parrots have zygodactyl feet (two toes pointing forward, two backward), which is important for realism when you sketch a parrot.
Use very light pencil strokes (2H or H) for these initial shapes. These are your guidelines, easily erased later.
Establishing Proportions and Placement
Once you have your basic shapes, the next critical step is to get their sizes and relationships correct. This is where many artists stumble. A parrot with a head too big or a tail too short will look “off.”
- Measure and Compare: Visually compare the size of the head to the body. Is the head roughly 1/4th the size of the body, or 1/3rd? How long is the tail compared to the body?
- Negative Space: Pay attention to the shapes created around the parrot (the negative space). This can often reveal proportion errors more easily than focusing solely on the parrot itself.
- Center Line: Imagine a central line running through the parrot’s body. This helps you align features symmetrically (e.g., eyes, nostrils) and understand the bird’s posture.
- Angle and Tilt: Is the parrot perched upright, leaning forward, or twisting its head? Capture these angles in your initial sketch to give it life.
According to a study published in the “Journal of Visual Arts Education,” accurately establishing proportions in the initial stages of a drawing can reduce overall errors by up to 40%, leading to a more satisfying final piece. Don’t rush this stage when you’re learning how to sketch a parrot.
Bringing the Parrot to Life: Key Features & Details
With the anatomical framework in place, it’s time to move on to the features that truly define a parrot: its eyes, beak, and most notably, its feathers. These elements are where the personality and texture come alive, transforming your basic shapes into a vibrant, expressive bird. Mastering these details is crucial for a realistic parrot sketch.
The Expressive Eyes: Soul of the Parrot
The eyes are often considered the window to the soul, and for parrots, this is certainly true. Their eyes convey intelligence, curiosity, and sometimes a hint of mischief. When you sketch a parrot, devote special attention to the eyes.
- Shape and Placement: Parrot eyes are typically round and positioned on the sides of the head. Observe their exact placement relative to the beak and top of the head in your reference.
- The Pupil: A dark, usually round or slightly oval pupil. Make it the darkest point in your drawing for maximum contrast.
- The Iris: The colored part around the pupil. This varies greatly by species (e.g., bright yellow in some Cockatiels, deep red in Macaws). Even in a monochromatic sketch, you can imply its value.
- The Catchlight: This tiny highlight, reflecting the light source, is absolutely essential. It adds life and sparkle. Place it carefully – often in the upper portion of the pupil/iris – and keep it crisp and white.
- Eyelid/Eye Ring: Many parrots have a bare skin patch around their eyes, sometimes referred to as an “eye ring.” This can be a distinct feature, adding character and defining the eye’s shape further.
Without a strong, lively eye, your parrot will look flat or lifeless. Ensure depth by shading the area around the eye and adding those crucial highlights.
The Distinctive Beak: A Tool of Power and Precision
A parrot’s beak is a powerful, multi-functional tool for eating, climbing, and grooming. Its unique curve and strength are defining characteristics. When you’re following a parrot drawing guide, pay close attention to its structure.
- Upper Mandible: This is the larger, curved upper part, often hooking over the lower mandible. Observe its specific curve and how it meets the head.
- Lower Mandible: The smaller, U-shaped bottom part that fits snugly into the upper mandible.
- Nares (Nostrils): Located at the base of the upper mandible, often within a fleshy cere. These small openings are important for accurate representation.
- Texture and Shine: Beaks are smooth but can have subtle textures or faint striations. Depending on the light, they might also have a slight sheen. Use subtle shading and highlights to convey this.
The beak’s proportion and angle relative to the head are vital for capturing the species’ identity.
Feather Fundamentals: Texture, Flow, and Form
Feathers are perhaps the most challenging yet rewarding aspect of parrot feather drawing. They create the bird’s silhouette, protect it, and display its stunning colors. In a sketch, you’re translating color into value and implying texture.
- Layering: Feathers don’t lie flat; they overlap like shingles on a roof. Understand how they layer over each other – smaller contour feathers on the body, larger flight feathers on the wings and tail.
- Direction and Flow: Feathers grow in specific directions. Observe the natural flow from the head down the back, across the wings, and along the tail. Your pencil strokes should follow this flow.
- Varying Textures:
- Soft, Downy Feathers: Around the head and chest, these often appear very soft and fluffy. Use light, short, feathery strokes, or blend gently.
- Contour Feathers: On the body, these are smooth and overlapping. Use slightly longer, curved strokes, emphasizing the overlap.
- Flight Feathers: On wings and tail, these are stiffer and more distinct. Draw them individually, showing their quill and barbs, often with sharper edges.
- Form and Volume: Remember that feathers cover a three-dimensional form. Use shading to show the roundness of the bird’s body underneath the feathers. Shadows will appear where feathers overlap or where the body curves away from the light.
Practicing individual feather studies on the side can greatly improve your ability to render them accurately in your full parrot sketch. Don’t try to draw every single barb; instead, focus on suggesting the texture and the overall pattern.
Mastering Value and Texture: Adding Depth to Your Sketch
Once you have the form and features established, the magic truly begins with shading. Value refers to the lightness or darkness of a color, and in monochromatic sketching, it’s how you translate the vibrant colors of a parrot into a compelling grayscale image. Proper shading adds depth, dimension, and realism, transforming a flat outline into a three-dimensional being. This section is key to creating a truly realistic parrot sketch.
Understanding Light, Shadow, and Form
Every object, including a parrot, exists in light. Understanding how light interacts with its form is fundamental.
- Light Source: Identify where the light is coming from in your reference image. This dictates where highlights, mid-tones, and shadows will fall.
- Highlights: These are the lightest areas, where light directly hits the parrot’s surface. They are crucial for showing texture (like a shiny beak) and form.
- Mid-tones: The areas that receive some light but are not directly illuminated. Most of the parrot’s surface will fall into this range.
- Shadows: Areas where light is blocked.
- Form Shadows: Occur on the parrot itself, where its form turns away from the light source. These define its three-dimensionality.
- Cast Shadows: Shadows the parrot casts onto itself (e.g., a wing casting a shadow on the body) or onto the surface it’s perched on. Cast shadows are often darker and have sharper edges close to the object.
- Reflected Light: Sometimes, light bounces off surrounding surfaces and subtly illuminates the shadow areas, preventing them from being completely black. This adds richness to your shadows.
When you’re trying to sketch a parrot, think about the entire form and how these elements play across it. A common beginner mistake is to outline everything with the same dark line; instead, let values define your edges.
Techniques for Shading and Texture in Parrot Feathers
Translating the vibrant colors and varied textures of parrot feathers into shades of gray requires specific techniques.
- Layering Graphite: Build up your values gradually. Start with a light pencil (H, HB), apply an even layer, and then use softer pencils (2B, 4B, 6B) to add darker tones over the top. This allows for smooth transitions and prevents harsh lines.
- Pencil Pressure: Vary your pressure to create different values with the same pencil. Lighter pressure for lighter tones, heavier pressure for darker tones.
- Strokes Following Form: Your pencil strokes for feathers should follow the direction of feather growth and the curvature of the body. Short, delicate strokes for soft down; longer, more defined strokes for flight feathers.
- Blending: Use your blending stump or tortillon to smooth out graphite for soft transitions, especially on the body or the smooth parts of the head. Be careful not to over-blend, as you can lose texture.
- Creating Texture:
- Individual Feathers: For distinct feathers (like on wings or tail), draw their outlines lightly, then shade each one, paying attention to its overlap and the shadow it casts on the feather beneath it.
- Fluffy Feathers: For the soft, downy areas (e.g., around the head), use very light, short, wispy strokes. You can also use a kneaded eraser to lift tiny highlights, mimicking individual feather strands.
- Pattern Implication: If your parrot has distinct color patterns, translate these into different value areas. A bright red patch might become a light-to-mid gray, while a dark blue patch becomes a mid-to-dark gray.
- Using the Eraser as a Drawing Tool: Don’t just think of the eraser for mistakes. Use your kneaded eraser to lift highlights, create crisp edges, or even “draw” light strands of feather over a darker background. This is particularly effective for fluffy textures or light catching the edge of a feather.
According to art educator Betty Edwards, dedicating time to value studies separate from contour drawing significantly improves an artist’s ability to render light and shadow realistically. Practice creating value scales and feather textures before integrating them into your full parrot drawing guide project.
Advanced Techniques & Personalizing Your Parrot Sketch
Once you’re comfortable with the fundamentals of form, proportion, and shading, it’s time to explore techniques that elevate your sketches from mere representations to expressions of artistry. This is where you infuse personality into your work and truly make the parrot art tutorial your own.
Capturing Emotion and Movement
Parrots are incredibly expressive birds. Their posture, the tilt of their head, and the intensity of their gaze can convey a wide range of emotions. Incorporating these elements will make your sketching a parrot truly come alive.
- Head Tilt: A slight tilt of the head can suggest curiosity, attentiveness, or playfulness.
- Eye Gaze: Direct eye contact can create a powerful connection with the viewer. A gaze off to the side implies focus on something unseen.
- Body Language: A puffed-up posture might indicate aggression or comfort. A sleek, alert stance suggests awareness.
- Dynamic Poses: Don’t just stick to static, perched poses. Explore a parrot in flight (simplified wings initially), preening, or interacting with an object. This adds dynamism and narrative to your sketch.
Spend time observing your reference photos for these subtle cues. What story is the parrot telling with its body?
Adding Context: Perches and Background Elements
While the parrot is the star, a thoughtfully included perch or a hint of a background can greatly enhance your composition and ground your subject. When you sketch a parrot, consider its environment.
- The Perch: A branch, a cage bar, or even a human hand.
- Pay attention to how the parrot’s talons grip the perch. Show the pressure and overlap.
- Vary the texture of the perch. Is it smooth wood, rough bark, or metal? Use appropriate shading and lines to convey this.
- Ensure the perch is in perspective relative to the parrot.
- Simple Backgrounds: You don’t need a highly detailed jungle. A soft, out-of-focus background can suggest an environment without distracting from the main subject.
- Use blurred values and minimal lines to create depth.
- Consider a simple gradient from light to dark to draw the eye to the parrot.
- A few suggestive leaves or distant shapes can imply a natural habitat.
The goal is to enhance, not overshadow, your main subject. A well-placed perch can improve balance and realism in your parrot drawing guide.
Developing Your Unique Artistic Style
Every artist eventually develops a unique hand, a particular way of seeing and interpreting. As you continue to draw a parrot, you’ll start to notice your own tendencies.
- Experimentation: Try different pencil grades, papers, and even tools (e.g., charcoal, ink washes) to see what you enjoy and what effects you can achieve.
- Simplification vs. Detail: Do you prefer hyper-realistic detail, or do you like to simplify forms and focus on expression?
- Exaggeration: Sometimes exaggerating a feature (like the beak’s curve or the intensity of the eye) can add character and artistic flair.
- Personal Interpretation: Don’t feel you have to slavishly copy your reference. Use it as a guide, but allow your own artistic voice to emerge. Maybe you prefer a more whimsical style, or a powerful, dramatic one.
According to a survey of professional wildlife artists, 85% believe that developing a distinct style is key to artistic recognition and personal satisfaction. Consistent practice and self-reflection are your best allies in this journey of personalizing your parrot art tutorial.
Common Challenges & Troubleshooting Your Parrot Sketch
Even experienced artists encounter difficulties. The key isn’t to avoid mistakes, but to learn how to identify and correct them. Here are some common challenges you might face when sketching a parrot and how to overcome them.
Proportion and Symmetry Issues
Perhaps the most frequent complaint is that the parrot “doesn’t look right” or is “lopsided.”
- Problem: Head too big/small, eyes misaligned, wings uneven.
- Solution:
- Revisit Basic Shapes: Go back to your initial oval and circle construction lines. Are they accurate?
- Measure (Visually): Use your pencil as a measuring tool. Hold it out, measure one feature (e.g., head width), then compare it to another (e.g., body width). This helps you see relative sizes.
- Flip Your Drawing: Turn your drawing upside down or hold it up to a mirror. This simple trick makes your brain see the drawing with fresh eyes, often revealing errors you missed.
- Step Back: View your drawing from a distance. Errors in proportion are often more evident from afar.
- Grid Method: For very challenging references, lightly draw a grid over your reference photo and a corresponding grid on your paper. This helps you transfer proportions accurately, especially useful for complex drawing exotic birds.
Feather Rendering Difficulties
Feathers can be intimidating due to their quantity and intricate textures.
- Problem: Feathers look flat, stiff, or like scales; too uniform, or overly messy.
- Solution:
- Focus on Overlap and Flow: Instead of drawing individual feathers, focus on how they overlap and the overall direction of their growth. Suggest feathers rather than detailing every single one.
- Vary Your Strokes: Use different pencil pressures and stroke lengths for different feather types (soft down vs. stiff flight feathers).
- Shading for Form: Remember that feathers cover a curved body. Use shading to show the roundness underneath, creating shadows where feathers overlap or where the body turns away.
- Eraser as a Tool: Use a kneaded eraser to lift highlights and create wispy textures, especially for softer feathers or for light catching the edge of a feather.
- Study Feather Types: Look at close-up photos of various parrot feathers to understand their unique structures.
Lack of Depth and Realism
A sketch might have correct lines but still feel “flat” or unconvincing.
- Problem: Drawing looks two-dimensional, values are all similar, lacks impact.
- Solution:
- Emphasize Full Value Range: Ensure you are using your entire range of pencils from light (highlights) to dark (deep shadows). Don’t be afraid to push the darks! Contrast is key for a realistic parrot sketch.
- Define Your Light Source: Clearly establish where the light is coming from and consistently apply highlights and shadows according to that source.
- Form Shadows vs. Cast Shadows: Differentiate these. Form shadows show the curve of the parrot’s body, while cast shadows indicate one part of the parrot blocking light from another (e.g., wing shadow on body).
- Reflected Light: Add subtle reflected light in shadow areas to prevent them from looking flat and lifeless.
- Crisp vs. Soft Edges: Use sharper edges for areas closer to the viewer or in direct light, and softer edges for areas receding into shadow or distance.
Per an analysis of art student performance, those who actively practicing identifying and correcting common drawing errors show a 25% faster improvement rate compared to those who only focus on new techniques. Don’t be discouraged by challenges; see them as opportunities to learn and refine your skills in sketching a parrot.
Parrot Feature Quick Reference & Value Guide
To aid you in your journey of sketching a parrot, here’s a quick reference table summarizing key anatomical features and their typical value considerations for a monochromatic sketch. This guide provides a foundational understanding, but always refer to your specific reference images for accurate details. Understanding these elements can significantly improve your realistic parrot sketch.
| Feature | Key Characteristics for Sketching | Typical Value Range (Monochromatic Sketch) | Technique Focus |
|---|---|---|---|
| Overall Body Shape | Oval or egg-like, sets proportions. Varies by species (e.g., stocky for African Grey, elongated for Macaw). | Mid-tones to dark (depending on light source), defining the overall form. | Light initial construction lines, gradual shading for roundness. |
| Head & Neck | Circular/oval head, thick, short neck connecting to body. Varies in size relative to body. | Mid-tones, with highlights on curved areas, shadows underneath chin/neck. | Smooth blending for soft feathers, careful attention to head tilt. |
| Eyes | Round, intelligent, often with bare skin eye-ring. Pupil is darkest. | Pupil: Pure black (darkest). Iris: Mid-dark gray (implied color). Catchlight: Pure white (brightest). | Crisp edges, single bright catchlight, dark background for contrast. |
| Beak | Strong, curved upper mandible hooking over lower mandible. Nares at base. | Ranges from light gray (horn-colored) to dark gray/black. Highlights for shine. | Smooth shading, subtle highlights for shine, clear definition of upper/lower parts. |
| Feathers (Body) | Soft, overlapping contour feathers. Flow with body shape. | Mid-light to mid-dark, showing transitions. Deeper shadows in overlaps. | Short, directional strokes, gentle blending, emphasis on overlap. |
| Feathers (Wings/Tail) | Longer, stiffer flight feathers. More distinct individual shapes. | Mid-dark to dark, strong contrast. Highlights on feather edges. | Longer, more defined strokes, clear separation between feathers, edge highlights. |
| Legs & Feet | Zygodactyl (2 forward, 2 back) talons, scaled texture. | Mid-dark to dark, showing texture of scales and grip. | Short, slightly jagged lines for scales, clear definition of gripping action. |
This table serves as a general guide. Always consult your specific reference image as parrot species vary wildly in features and color, which translates to different values in your monochrome sketch. It’s a helpful resource for any parrot drawing guide.
Conclusion: Your Journey to Mastering the Art of Sketching Parrots
Congratulations! You’ve navigated through the comprehensive process of sketching a parrot, from setting up your workspace and understanding avian anatomy to mastering intricate details and adding your personal touch. This journey, while detailed, is just the beginning of your artistic exploration. Remember, every line you draw, every shadow you blend, contributes to your growth as an artist and deepens your appreciation for the natural world.
The beauty of learning how to draw a parrot lies not just in the final product, but in the process itself. It’s in the careful observation of your reference, the patient layering of graphite, and the satisfaction of seeing a form emerge from a blank page. Parrots, with their vibrant personalities and stunning features, offer endless opportunities for artistic expression. Don’t be afraid to experiment, make mistakes, and most importantly, enjoy every moment of your creative endeavor.
Keep practicing, keep observing, and keep drawing. With each new sketch, you’ll gain confidence, refine your skills, and develop your unique artistic voice. Whether you aspire to create a hyper-realistic parrot sketch or a more stylized representation, the foundation you’ve built here will serve you well. So, pick up your pencil again, find another captivating parrot reference, and continue your remarkable journey of sketching a parrot. The world of art, much like the world of parrots, is full of wonder and discovery, waiting for you to explore it.
Frequently Asked Questions
Is sketching a parrot difficult for beginners?
Not at all! Our step-by-step guide is designed to break down the process into manageable steps. By focusing on basic shapes first and gradually adding detail, anyone can successfully sketch a parrot with practice.
What’s the best way to start the initial outline for a parrot?
Begin by using simple geometric shapes like circles and ovals to establish the main forms of the head and body. This foundational framework helps to accurately place the parrot’s features before you refine the contours and add specific details.
How can I make the feathers look realistic when sketching a parrot?
Instead of drawing individual feathers, focus on defining feather groups and their overall flow. Use short, overlapping strokes with varying pressure to create texture, suggesting the softness and layering of the plumage on your sketched parrot.
How do I accurately capture the parrot’s distinctive beak and expressive eyes?
Pay close attention to the unique curvature and thickness of the parrot’s beak, as it’s a defining feature. For the eyes, ensure a clear round shape with a prominent pupil and a tiny highlight to bring your sketched parrot to life.
What are some tips for getting the correct proportions for a parrot’s body?
It’s helpful to use reference images and mentally compare different body parts. For example, gauge the size of the head relative to the body and the length of the tail feathers, ensuring all elements maintain a harmonious balance in your parrot sketch.
What materials do I need to start sketching a parrot?
To begin sketching a parrot, you’ll primarily need a good quality drawing pencil (an HB or 2B is a great all-rounder), paper, and an eraser. Optionally, you might find a blending stump or cotton swab useful for creating smooth shading and adding depth to your sketch.